How to Make Snippets and Ephemera Clusters 2 Different Ways


Come craft with me as I make snippets and clusters for my junk journals!


Welcome to my paper crafting adventure, where we embark on a journey exploring the wonderful world of junk journals and mixed media art! Today, I'm thrilled to share with you two different methods for crafting snippet rolls and ephemera clusters – the perfect embellishments for any junk journal enthusiast. Whether you're a seasoned artist seeking fresh inspiration or just starting out in the realm of mixed media and art journaling, you're sure to find helpful tips and ideas to ignite your creativity.

Enter the magical realm of repurposing fabric scraps and paper remnants, giving new life into materials that might otherwise go to waste. Together, we'll transform these humble scraps into delightful rolls and clusters that will add character and charm to your journal pages.

Join me as I demonstrate step-by-step techniques, guiding you through the process with ease and enthusiasm. Whether you prefer sewing or gluing, there's a method here for everyone. From intricate lace scraps to colorful fabric pieces and paper bits, we'll explore how to combine these elements to create stunning embellishments for your junk journals and art journals alike.

I believe in the power of creativity to transform the ordinary into the extraordinary, and I invite you to unleash your imagination alongside me. Whether you're crafting for relaxation, self-expression, or simply the joy of creating something beautiful, there's no limit to what we can achieve together.

Don't forget to show your support by liking, sharing, and subscribing for more creative tutorials and inspiration. Let's spread the joy of crafting far and wide!

Happy crafting, and may your journals be filled with endless creativity and inspiration!

I promised to share product links with you. Please note that these are affiliate links, and I may earn a small commission if you purchase through these links.

My Shabby Chic Collage Papers can be found in my Etsy shop and also at Creative Fabrica.

Faux postage stamp sets by various artists:


How to Print Stained Glass Stickers on Clear Sticker Paper


Full instructions on how to print pretty stained glass stickers with your inkjet printer!

This video shows how I to print stained glass style clipart on clear sticker paper, to make your own beautiful stained glass stickers!

The links below are affiliate links. If you make a purchase using these links I may receive a small commission (at no extra cost to you).

The clipart I used is from these shops at Creative Fabrica:


The clear sticker paper I got from Amazon.

These stained glass stickers are so pretty for making cards, decorating pages in your journal or planner, and so much more! Please comment below with your questions and ideas, and tag me on Facebook or Instagram to share your project photos!

@MarcyCoate @marcycoatedesigns
#stainedglassart #stickersheet #stickersheets #stickerpaper 

Making an Ephemera Keeper for Your Paper Crafting Scraps

What is an Ephemera Keeper? 

An ephemera keeper is a tool used to organize and store paper crafting scraps, such as leftover papers, embellishments, and cutouts. 

Why is it Important to Keep Paper Crafting Scraps Organized? 

Keeping paper crafting scraps organized allows for easier access to materials, reduces waste, and inspires creativity by providing a visual reference of available options. 

Importance and Benefits 

Easy Access to Materials By keeping your paper crafting scraps organized, you can quickly locate and retrieve the materials you need for your projects, saving time and effort. 

Reduced Waste

Organizing your scraps allows you to see what you have and encourages you to repurpose and use them, reducing the amount of waste generated from your paper crafting activities. 

Essential Materials for Creating an Ephemera Keeper 

To create an ephemera keeper, you will need a sturdy box or container, dividers or pockets, adhesive, scissors, and decorative materials. 

Optional Tools and Embellishments 

Additional tools and embellishments, such as labels, markers, washi tape, and stickers, can be used to personalize and decorate your ephemera keeper.

If you want to make a Shabby Chic version, be sure to include lots of laces and tims!

Step 1: Prepare your Container 

Choose a suitable container for your ephemera keeper, such as a box or binder. Clean and decorate it if desired. 

Step 2: Create Dividers or Pockets 

Divide your container into sections using dividers or create pockets to separate different types of paper crafting scraps. 

Categorize and Label Your Scraps 

Organize your scraps into categories, such as patterned paper, die-cuts, and stickers. Label each section to quickly identify the contents. 

Sort by Size and Color 

Arrange your scraps by size and color to easily find matching pieces for your projects. This also adds visual appeal to your ephemera keeper.

Scrapbooking with Ephemera 

Use your organized scraps to create beautiful and unique scrapbook layouts. Mix and match different papers and embellishments for interesting designs. 

Card Making and Paper Crafts 

Incorporate your paper crafting scraps into handmade cards, tags, and other paper crafts. These scraps add texture and dimension to your projects. 

Preparing for a Paper Crafting Session 

Before starting a paper crafting session, gather your ephemera keeper and sort through it to find inspiration and ideas for your project. 

Easy Cleanup and Organization 

After completing a paper crafting project, utilize your ephemera keeper to quickly store and put away any leftover scraps, keeping your workspace tidy. 

Start Organizing Your Paper Crafting Scraps Today! 

Don't let your paper crafting scraps go to waste. By creating an ephemera keeper and organizing your materials, you can unleash your creativity and make the most of your supplies. 

Be sure to check out the example projects below. They are so clever and beautiful! Some feature printables that will help you create a stunningly beautiful work of art!


Link to the kit for this Gorgeous Desktop Trio
for Organizing Your Ephemera


Here's a clever idea for making ephemera storage using CD sleeves


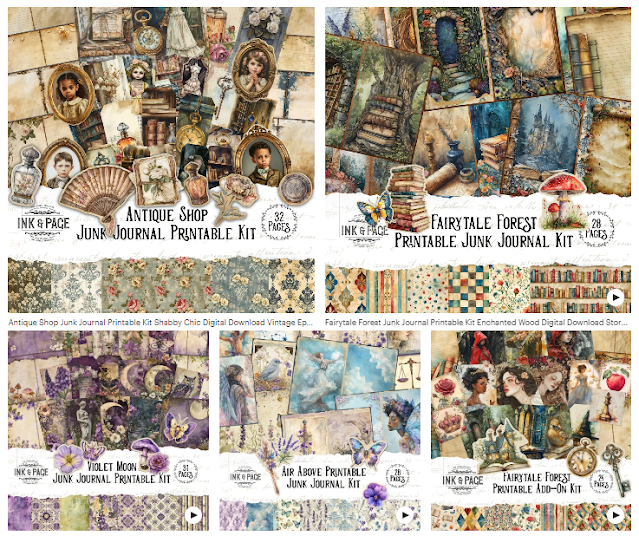
Spotlight on Ink and Page Journals High-Quality Printables

This post contains affiliate links. If you make a purchase using these links I may receive a small commission (at no extra cost to you).

One of my favorite Etsy shops is Ink and Page. They focus on

journals and stationery. I love the artistic style of their journal kits, and every time there is a new kit, I go crazy!


Recently I made a gothic journal for my granddaughter using various kits from this shop. The journal turned out beautifully, and my granddaughter was thrilled with her journal.


  1. Shop Overview

    • Ink and Page has over 25,000 sales on Etsy and is a Star Seller, which means that they answer messages from customers quickly, and have lots of positive reviews.

  2. Promotions and Discounts

    • Be sure to sign up for their newsletter to receive freebies and notifications of new products and discounted sales.

  3. Warning!

    • Their printables are so beautiful that you may become addicted (like me) and start collecting them, just for the fun of it!
Happy crafting!
Marcy

Ballet Animals Watercolor Clipart


These are the most adorable little ballet animals, done in watercolors,
in a set of clipart made by Jen Digital Art at Etsy. So much fun for
all of your paper crafts such as journals, planners, scrapbooks and more.
Or use them for pretty party invitations and greeting cards.

Organizing Lace Samples for Shabby Chic Crafts


Here's a pretty way to organize your laces & trims using a rolodex or memorydex.
I got the cards from Shabby Art Boutique. This is the set that includes the cards.

Gothic Journal Using Kits from Ink & Page

Here is a gorgeous journal that I made for my granddaughter, for Christmas. She loves the gothic style, so when I asked her if she would like a gothic journal, she was like YESSSSS!!! I hope she will love it. Have a look at this short video, to see how it turned out...


I used the following kits from Ink & Page:

Gothic Garden, Haunted Library, Poison Garden,
Midnight Gothic & Wraithwood Manor, but
there are LOTS MORE you can choose from!

Bullet Journaling Classes - an Honest Review

So, you love the idea of doing a bullet journal, but maybe you are a little intimidated about some parts. Maybe you are asking yourself how to bullet journal, or what supplies are needed for bullet journaling, and so on. In order to help you out, today I'm reviewing a few classes on bullet journaling in order to help you save some time!

These classes are from Creative Fabrica, and you can get one month of full access for only $1 with my special link. If you already have a CF subscription with full access, the classes are included at no extra cost!

Doodle Practice for Fine Motor Skills

Today's Doodle

I love to doodle, but I would really like to fill in a bigger design with small doodles. I often find it hard to come up with a big design on my own, so I printed out these coloring pages and filled one in with smaller patterns. It's relaxing, and it's great practice for both my hand and my eyes. I might color it in sometime, when I'm bored, or I might cut it into smaller pieces to use in my art journal, but for now I'll just keep it in my sketch book.


I started with one of these, and filled it in with small doodle
patterns instead of coloring it. I used a 0.3 fineliner in black.

Mixed Media Collage for Beginners


Abstract Mixed Media Collages on Index Cards
by Marcy Coate

Lately I've been really enamored with abstract mixed media that is done on a collage background. There are lots of them on Pinterest, Instagram and YouTube, and I've been trying with a few, but just so frustrated. I could never get the background to turn out like anything except a muddy mess. 

However, the other day I was downloading something or other from Creative Fabrica, and I came across this shop that is full of beautiful collaged backgrounds in all different color palettes. So I thought...wait a minute! You could print those out on plain white cardstock and do your mixed media stuff on top of that!

So I tried it, and the photo above is the result. I printed the backgrounds 4 to a page so that they are about the size of index cards. Then I went crazy with my acrylic markers, Sharpie markers, water soluble pastel crayons and some watered down white acrylic paint for the splatters. I'm so pleased with the result.

At first I was a little timid, making small marks, but then I decided to make some bigger, really odd shapes to just experiment. After all, if it didn't turn out the way I wanted I could always print out the backgrounds again and start over. I mean...it's just paper!

I feel like the artist in me has finally been liberated! Stay tuned for a YouTube video where I'll show you some of the techniques that I am using.

Popular Posts